Paper Dahlia Wreath Tutorial
Paper Dahlia Wreath Tutorial

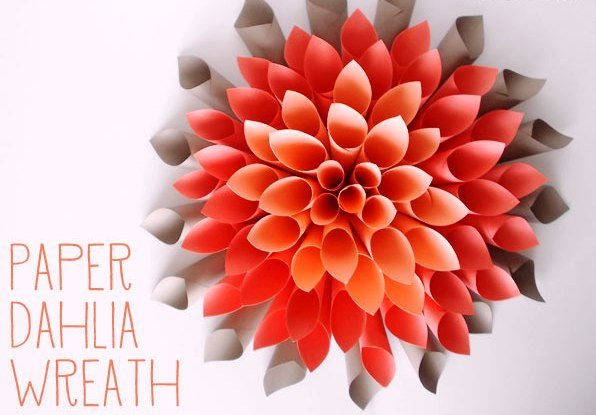
In an effort to encourage spring weather to come back to me I decided to make my very first spring wreath! If you have been around LPH for any amount of time you may have already realized that I kinda have an obsession with wreaths. This time I decided to step outside of my comfort zone and go with a complete DIY. No wreath form or anything! Just stuff I had on hand. What did I come up with?? This gorgeous Paper Dahlia Wreath!
It really wasn’t hard to create at all. Time consuming? Yes. But not hard. And it’s final impact is totally worth the effort you put in!

Supplies:
- Cardboard {I used a cereal box and cut it into an 8-inch circle. Fiskars makes the best circle cutter if you want a perfect circle.}
- Paper {I used 25-30 pages of 8.5×11 cardstock}
- Hot glue gun
- Scissors

Begin by cutting you paper in fourths. You don’t want the full pages. If you used the whole pages your wreath would probably be about 3 feed wide. I decided to use 1/2 sheet pieces of gray for the bottom layer. In hindsight, I should have cut them down as well. If you use 12×12-inch paper, cutting it in fourths is still the way to go.

Roll your cut paper into a cone, having a corner be the tip of the “petal”. Place a small dab of hot glue on the paper to keep it rolled in a cone shape.

Just keep rolling and hot gluing so that you have a mountain of cones. {P.S. don’t they kinda look like a fancy bouquet of paper flowers!?}

Take your cones and flatten and fold up the bottom 1/2-inch. Put a small amount of hot glue on the flattened part and place on the outside rim of your cardboard circle. For the first round, leave a small gap between cones.

Continue to fold, glue, and place the remaining cones, alternating their placement between the previous round’s cones. Glue each round closer to the center and not on top of the previous row’s flattened ends.

Keep adding your rounds until you reach the very center! I made the middle 4 cones slightly skinnier than the previous rounds but that is not necessary.

Voila! Now you’ve created a show stopping Paper Dahlia Wreath that is just perfect for spring!! Just glue a little ribbon the the back of the cardboard and hang that puppy up!