How to Choose the Right Microblading Needle (aka microblades)?
In the world of microblading, needles come in various shapes, sizes, and types. You can choose from curved blades, round and flat shaders to U-blades, different diameter sizes, to the number of pins in it. It can be overwhelming and confusing to choose the right microblading needle. In this article, we will break them down one by one.
Reminder: Quality and Sterilization of Microblading Needle
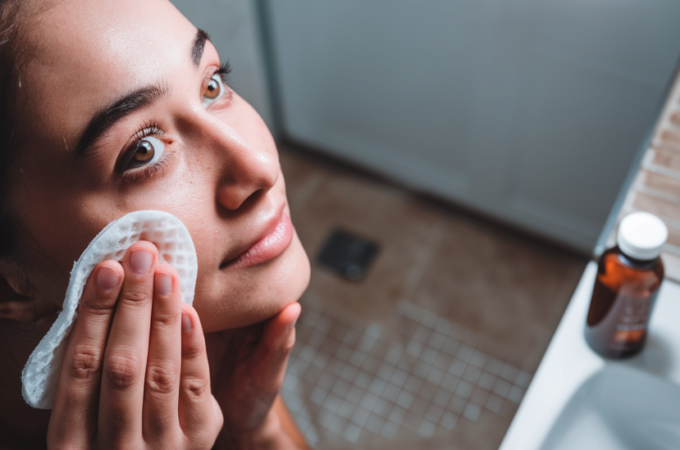
Ensuring that your microblading tools came from a legitimate and trustworthy supplier ensures the excellence and safety of each needle. Pay extra attention to defective or damaged needles. Even a tiny split or damage on your needle will cause severe consequences to your clients, such as excess bleeding or scar. The worst scenario is it causing skin damage to your clients. To check the quality of a microblading needle, we recommend using a magnifying glass to check each needle configuration. Double checking at the start of the procedure can save you a lot of problems.
How to Choose Microblading Tools
There are many factors to consider when finding a suitable needle combination for a client. The considerations are the skin type, skin thickness, natural hair thickness, desired style and specifics of what the microblading artist is trying to achieve.
Choosing the Suitable Needle (Pin) Size

The idea number of pins is determined by the length of strokes you are trying to do:
7-9-pin: For creating fine, shorter strokes (especially between longer strokes), as well as adding touch-ups to existing healed brows, the 7-9-pin is an excellent choice. Adding touch-ups to the existing fullness.
12-pin: This is the most common pin size for many artists and works well with almost all clients. With a 12-pin needle, you can produce medium-length strokes with a medium thickness.
14-17-pin is excellent for creating beautiful long strokes.
Microblading Needle Thickness
Proper needle thickness is determined by a few factors:
Natural Hair Thickness: It’s often best to match the natural hair thickness of your client by using needles with the correct thickness. Thicker needles produce thicker hair strokes. Use this if your client has thick natural hair. Thinner needles provide more delicate hair stroke and better for clients with finer natural hair.
Skin Type: Thickness and condition of the client’s skin also affect the appropriate needle diameter. In general, thinner skin requires thinner needles and vice versa.
Desired effect: Fine strokes vs shading also requires different needles thickness.
A blog post from Perpetual Permanent Makeup highlights how to choose needle taper and diameter.
The Right Microblade Base / Strength
The base of a microblade influences the amount of strength you need to apply while performing the microblading procedure. You can choose from:
Flexible needles include a plastic base that is often in white or yellow color. This type of base is suitable for practicing and learning the correct pressure. If you are a beginner, it might be challenging to control the angle and stroke direction.
Hard needles usually have a stainless-steel base. It can easily go deeper than the flex blades, allowing the pigment to penetrate the skin, making darker and longer lines. It is also easier to control the direction and line so a better fit for beginners. Beginners still need to be careful as it might cut too deep.
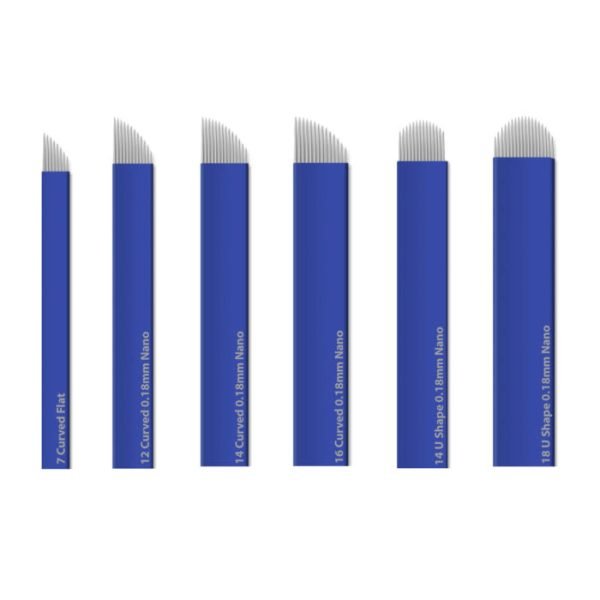
Microblading Needles Shape / Configuration

The needle configuration dictates the effect or the details of the hair strokes on the brows. Here are the most common microblading needle shapes / configurations:
Round Flat Needles
For making curved strokes, round flat blades are the recommended needle type. Upon using the round flat needle, either use the front or the middle section – not all the blades at the same time. Also, if you are a beginner, be careful with the midsection because it can result to trauma to the skin.
U Shape Needles
With U Shape Needles, you can also create different kinds of hair strokes. For example, if you hold the needle straight, it will allow more needles to interact with the skin, making less curved hair stroke. While if you hold it vertically, few needles will come in contact with the skin, functioning as a single needle that can allow you to create tiny, crisp, and curvy brows.
Just beware that it is sharp at both ends, so you need to have a good experience before using it, or it may cause you to stroke outside of your design.
Round Shader
For a comprehensive shading tool, the round shader will do wonders. It has a more extensive grouping of needles (pins) meant for larger areas of shading. It implants more pigment faster with a more expanded shading effect with less trauma to the skin. You may choose a smaller grouping of needles which works well for smaller shading areas.
Flat Double
The flat double needle is another amazing tool. Consisting of two layers of needles, it allows you to create uniform and precise dual strokes in a shorter time. This flat double blade can be fitted on usual microblading, including both eccentric and classic designs. With its flexibility, you can place the blade at any angle, making it adaptable to your style and technique.
This needle is also ideal for ombre brow and manual shading techniques before filling in the finer details. Because it is incredibly sharp and precise, you can shade the brow perfectly and achieve that denser effect for your clients.
In Summary
Choosing the correct microblading needle is highly important for you to obtain the best results for your clients. It depends on the nature of your client’s skin as well as your skill level and how comfortable you are with various microblades. Do your research, practice, and you should find the tools that work best for you!