Okay so this is NOT a typical post! Not a teaching-related material, at all! I am just so excited about it!!! I can’t help but share it!
Now…just to warn you all…I am a teacher, not a self-proclaimed crafting professional…BUT, I think my burlap wreath came out pretty good!! I wanted to share with you all how I made it because it was an idea in my head that actually turned out right! That never happens!
Burlap Wreath Tutorial

You will need a few things first. You can get everything below at Michael’s…but I am sure there are other places, too! 🙂 You can also use real flowers if you want to! That could be fun!
1. Flowers or decor of your choice. It can be little buttons or whatever you choose to decorate your wreath with…this can really change depending on what you want!

2. Burlap! I went through three of these rolls from Michael’s. It will depend on how full you want your wreath to look. I wanted mine to be really full; however, your taste may be different.

3. Pipe cleaners or wiring. I was looking for wiring at Michael’s, but was struggling to find a tan color. The lady at the store suggested the tan colored pipe cleaners! She is a genius! 🙂 They worked perfectly. I needed 2 bags of the tan pipe cleaners (the tan was the same color as the burlap). Cut the pipe cleaners into thirds.

4. A green wired wreath shape (found in the wreath section at Michael’s) – you will see part of this in a picture below.
My steps 🙂
Below is what you will get when you are part of the way through. I felt it was easier to explain this to you if I showed you this first – this might be part of my “Begin with the end in mind” trait I have from the Seven Habits 😉

To get started, just attached the end of the burlap to the wiring by slipping a pipe cleaner through the burlap and twisting it behind the wiring (you want to hide the pipe cleaner).
Then you will just continue on by looping the burlap in whatever size loops you like.
I found this was super easy to do while sitting on the ground. You have so many supplies around you that it is just so easy to just sit on the ground 🙂 Also, burlap sheds a little bit, and I did not want to have to clean that up inside of my house!

Above you can see how the burlap is attached in some spots, then hangs off. You never have to cut the burlap! It just goes on in all one piece 🙂 Great, right!?
Take the burlap in your hand and loop it to the size loop you want.

Scrunch the burlap together where you will be wrapping the pipe cleaner around it. You are going to push this into the part of the wreath you have already added some burlap. The closer to tie each loop to the others, the more full your wreath will be. They will slide a little once tied, but that is good because then when you are all done, you can adjust the burlap to fill in any spots that don’t look as full as others. Remember to attach/tie to all 4 wires on the wire wreath so that you can a full wreath and don’t see the wires. I just went across each row of wires as I went.

Stick the pipe cleaner on from the top, toward the back of the wreath. Put it around a green wire from the wire wreath, so that it has something holding the loop of burlap back to the wreath. Then twist!

Here is what you will see from the top until to pull the burlap up and “fluff” the wreath. The pipe cleaner will be hidden by the next loop you do, as well.

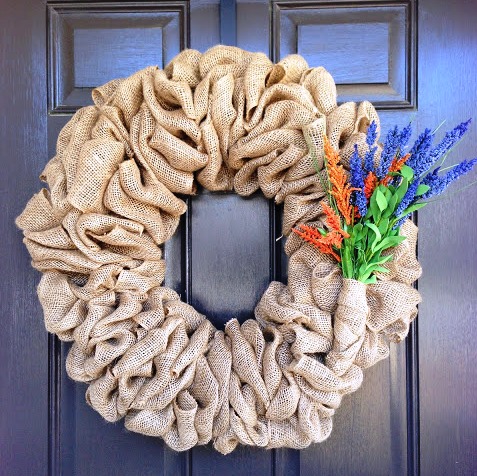
Last – I wrapped the flowers and burlap and attached them with a pipe cleaner, also. I want to get a little “P” for our last name, or something “AU” for Auburn to put on there next to the flowers, but for now, I think it came out great! 🙂 Another cute idea I have seen is people bought a different color fabric and tied a bow around the their wreath – that look super cute, too! 🙂

Let me know if you decide to make a burlap wreath! I hope I helped 🙂 Trust me, if I can do it – you can definitely do it! 🙂