Mid Century Modern Kitchen Cabinets Hardware Legs and Edges
Mid-century modern style started in the 1940s and 50s, but it feels fresh today because it’s simple, warm, and practical. In the kitchen, that look shows up as clean lines, warm wood, and cabinets that feel like real furniture.
If you want mid century modern kitchen cabinets that look timeless (not trendy), focus on three things: hardware, legs, and edges. These small choices decide whether your kitchen looks true to the era—or just “almost there.”
This guide breaks it all down in clear, simple steps you can use right away.
What Makes Mid-Century Modern… Mid-Century Modern?
Before you choose parts, know the “rules” of the style:
- Clean lines: flat doors, simple shapes, and no heavy ornament.
- Natural materials: walnut, teak, oak, ash, and quality veneers.
- Functional design: every piece does a job; nothing extra.
- Horizontal flow: long, low runs of cabinets; grain that lines up.
- Light feel: cabinets look like furniture, often lifted on legs.
Hold each decision up to these ideas. If it adds clutter, skip it. If it adds warmth and function, it’s probably right.
Cabinet Doors & Finishes (Your Base Layer)
Hardware, legs, and edges work best when the base is right.
- Door style: slab (flat) doors and drawer fronts are the MCM standard. For a twist, ribbed or tambour doors on an appliance garage can also work—but keep the rest quiet.
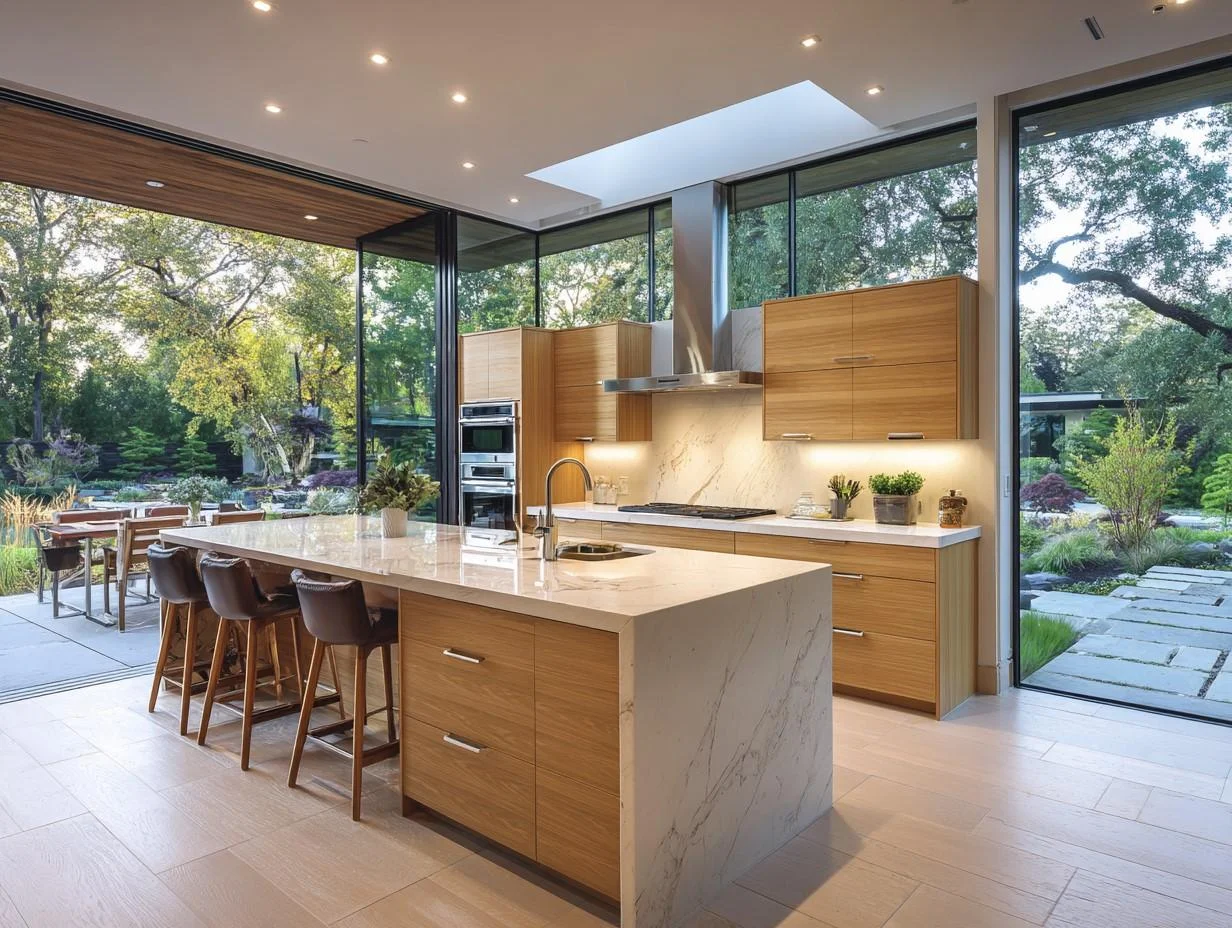
- Wood species: walnut is the classic, with a rich brown tone. White oak, teak, and ash also fit. Choose straight grain or book-matched veneer for that long, calm look.
- Finish: low-sheen clear coats, oil-wax blends, or a hand-rubbed feel. Avoid super-gloss unless you’re going for a 60s laminate vibe.
- Color: If you paint, think soft white, charcoal, or deep moss. Bright pops—mustard, aqua, tomato red—work as accents on a single section or appliance garage.
Now let’s dial in the three details that sell the look.
Hardware: The Small Detail That Sets the Tone
The right pulls and knobs make your mid century modern kitchen cabinets read “authentic” from across the room. Aim for simple forms with a high-quality feel.
Best Shapes & Styles
- Tab pulls / edge pulls: Slim metal tabs that mount to the top edge of drawers. They almost disappear, so the wood stays the star.
- Slim bar pulls: Think pencil-thin, straight bars with soft ends. No big “cup” pulls; those lean farmhouse.
- Button knobs: Small, round knobs in wood or metal. Keep them petite and flat-faced, not bulbous.
- Integrated finger pulls: Routed “galleries” or finger grooves along the door edge. These are ultra-clean and very mid-century.
Finishes That Work
- Satin brass: warm and soft, not overly shiny. A classic pairing with walnut or oak.
- Brushed stainless / chrome: crisp and machine-age. Great with darker paint or laminate.
- Matte black: modern and grounding; works best when used sparingly and repeated on lighting.
Pick one metal and repeat it on hardware, lighting, and maybe the faucet for a calm, connected look.
Placement & Scale (Quick Rules)
- Drawers: Center pulls vertically, and place them ⅓ in from each side for long drawers (or one centered pull if the drawer is under 24″).
- Doors: Put knobs or pulls near the opening edge, 2″–2.5″ from the corner.
- Appliance panels: Scale up—choose longer bar pulls (12″–18″) with the same finish to keep the language consistent.
Pro Tip: If you’re refacing or upgrading on a budget, swapping old hardware for slim tab pulls in a warm brass or brushed steel can transform the feel in an hour.
Legs: Turn Built-Ins Into “Furniture”
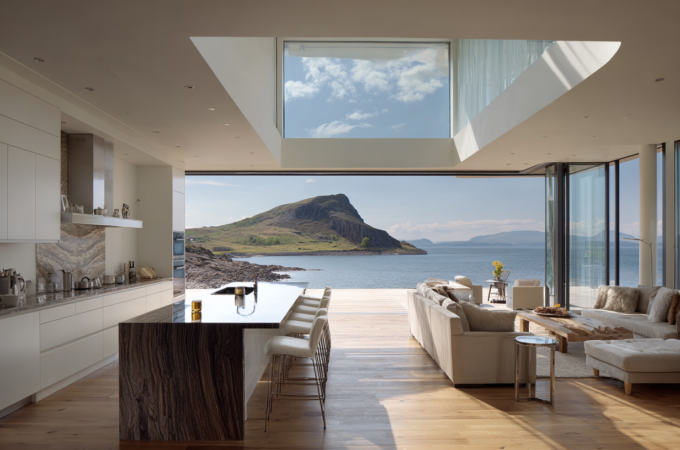
One of the strongest mid-century signals is the furniture look. That means you see the floor under the cabinets and the boxes sit on slim legs or a recessed plinth. This makes the kitchen feel open, light, and special.
Three Leg Styles That Nail the Look
- Tapered wood legs Slightly angled, round or square, with a narrower foot. Think classic Danish designs. Use walnut or oak to match (or intentionally contrast) the case.
- Pencil legs (metal) Straight, slim metal legs with simple levelers. Great for islands and sideboards.
- Hairpin legs Iconic mid-century shape—wire bends forming a V. Use sparingly in kitchens, often for an island or a console-style tall unit.
Heights & Spacing
- Height: Most base cabinets sit at about 34.5″ before countertop. If you add visible legs, target 6″–8″ clear height so the profile looks right and is easy to clean under.
- Spacing: Add legs at corners and every 18″–24″ along long runs or use a recessed steel plinth for hidden support with just corner legs visible. Islands often need center support; hide extra legs behind a shadow line.
Recessed Toe-Kick (The “Floating” Trick)
If full legs aren’t practical, use a 4″–6″ recessed toe-kick set back 3″. Paint it dark or match the floor. This creates a shadow so cabinets appear to float—very mid-century.
Pro Tip: Cap leg bottoms with adjustable levelers or glides. Old floors rarely sit true, and you want everything perfectly level without shims showing.
Edges: The Quiet Details That Keep It Mid-Century
Mid-century modern avoids heavy curves and ornate routing. For mid century modern kitchen cabinets, edges should be soft and honest.
Cabinet Door Edges
- Eased edge (⅛” roundover): Soft to the touch, nearly square from a distance.
- Micro-bevel: A tiny 45° break that catches light and adds a crisp line.
- Finger-pull groove: Routed along the top of drawers or side of doors as integrated hardware.
Avoid ogee, cove, and Victorian profiles. They fight the style.
Countertop Profiles
- Square eased: The go-to. A tiny top/bottom break keeps it comfortable without looking bulky.
- Chamfer: A shallow bevel for a graphic shadow line.
- Knife edge (for stone alternatives): Super sleek; use with caution on busy households.
Edge-Banding (When Using Plywood or Veneer)
If you choose plywood boxes or veneered doors, finish the edges cleanly:
- Solid-wood edge banding: ⅛”–¼” strips look premium and take finish well.
- Heat-applied banding: Fast and neat; trim flush and finish to match.
- Reveal edge: Intentionally show a thin band of lighter ply for a crafted, modern detail.
Pro Tip: Align door and drawer reveals at ⅛”–3/16″. Uniform, tight gaps read “custom.”
Materials That Feel True
Wood & Veneer
- Walnut veneer on stable cores keeps cost and movement down while offering the classic look.
- Rift-sawn white oak gives straight grain and a lighter Scandinavian mood.
- Ash and teak are also period-correct; stain ash for a calm, even tone.
Painted & Laminate Fronts
- Painted MDF: Smooth, durable, great for slab doors.
- Laminate (Formica-style): Retro and durable. Consider solid colors or subtle patterns. A metal T-mold edge (aluminum) around laminate is a true period detail for a diner-modern feel.
Interiors & Boxes
- Birch ply or pre-finished maple ply boxes are long-lasting and look great with open cabinets or glass doors.
- Use concealed (Euro) hinges for clean faces and easy adjustments.
Layout Choices That Look Mid-Century
- Long drawer banks: Stacked drawers with long pulls create strong horizontal lines.
- Appliance garage with tambour door: Hides clutter, adds a subtle texture.
- Open shelf moments: A single open shelf run in matching wood above a backsplash keeps things light.
- Simple uppers: Consider fewer uppers or slab fronts with lift-up doors for a clean, low-visual-weight wall.
Lighting & Backsplash That Support the Look
- Lighting: Globe pendants, slim brass sconces, or understated track. Keep shapes simple; repeat your metal finish.
- Backsplash: Stacked (not staggered) tile, vertical or horizontal. Terrazzo, simple ceramic, or a laminate cove backsplash if you’re going retro.
- Counters: Warm wood butcher block (sealed well), matte quartz in cream or gray, or classic laminate for budget-friendly authenticity.
Budget-Smart Ways to Get the Look
- Reface, don’t replace: New slab doors on solid boxes save thousands.
- Swap the hardware: One coordinated metal across pulls, faucet, and lights brings instant order.
- Add legs to the island: Use tapered legs and a recessed support rail for strength.
- Edge upgrades: Add ⅛” solid-wood edge banding to painted doors for a richer feel.
- Unify the palette: Two wood tones max (one for cabinets, one for floor) plus one metal.
Simple Install & Sizing Tips
- Pull length:
- Small drawers (≤24″): 5″–8″ pulls
- Medium (24″–36″): 8″–12″ pulls
- Large (≥36″) or appliance: 12″–18″ pulls
- Knob sizing: 1″–1.25″ diameter keeps things refined.
- Leg placement: corners plus every 18″–24″; add a hidden steel sub-rail for long spans.
- Reveal consistency: keep ⅛”–3/16″ gaps around doors/drawers; shim hinges and adjust feet until reveals are even.
Care & Maintenance (So It Ages Gracefully)
- Wood fronts: Dust weekly, wipe with a damp cloth and mild soap. Use an oil-wax refresh every 6–12 months if the finish allows.
- Brass hardware: Satin brass can patina; if you prefer it bright, choose lacquered brass or clean with a non-abrasive polish.
- Laminate fronts: Mild soap and water only; avoid harsh scrub pads on edges.
- Legs & level: Re-level annually if floors shift; tighten hardware so doors stay aligned and quiet.
Common Mistakes to Avoid
- Mixing too many metals: Pick one finish and commit.
- Ornate profiles: Ogee edges and raised panels fight the style.
- Chunky toe-kicks: Deep, full-height kicks look heavy. Use legs or a recessed plinth.
- Random grain: Keep veneer grain running in one direction on a bank for a calm, custom look.
- Over-stuffed uppers: Too many upper cabinets can feel busy—balance with open shelf moments or lift-ups.
Quick Starter Combos (Copy-Ready)
Warm Classic
- Walnut slab doors, satin brass tab pulls, eased square countertop edge, tapered walnut legs, off-white stacked tile.
Scandi Light
- Rift white oak, brushed stainless bar pulls, chamfered quartz edge in light gray, pencil metal legs on island, pale gray backsplash.
Retro Modern (Budget-Friendly)
- Painted slab doors in soft moss, matte black slim pulls, laminate counters with aluminum T-mold, recessed toe-kick, globe pendants.
Step-By-Step: Transform What You Have
- Edit and clean: Remove extra trim, crown, and corbels to simplify the lines.
- Reface or repaint: Go slab fronts or smooth painted doors.
- Pick one metal: Choose satin brass, brushed chrome, or matte black and repeat it.
- Swap hardware: Install slim tab pulls or small knobs at correct positions.
- Add the furniture feel: Install tapered legs at visible corners; use a recessed rail for hidden support.
- Sharpen the edges: Choose a square-eased countertop profile; add micro-bevel door edges if replacing fronts.
- Finish with lighting: Globe pendants or slim brass sconces to echo your hardware.
You can do this in stages. Each step moves your kitchen closer to a true mid-century modern feel without tearing everything out at once.
Final Thoughts
Mid-century modern cabinets works because it’s simple, warm, and honest. When you focus on hardware, legs, and edges, your mid century modern kitchen cabinets stop looking generic and start looking designed.
Choose slab doors, keep lines clean, lift the boxes with legs or a shadowed plinth, and use one calm metal finish everywhere.
The result is a kitchen that feels like a well-made piece of furniture—one that will look right today, tomorrow, and ten years from now.