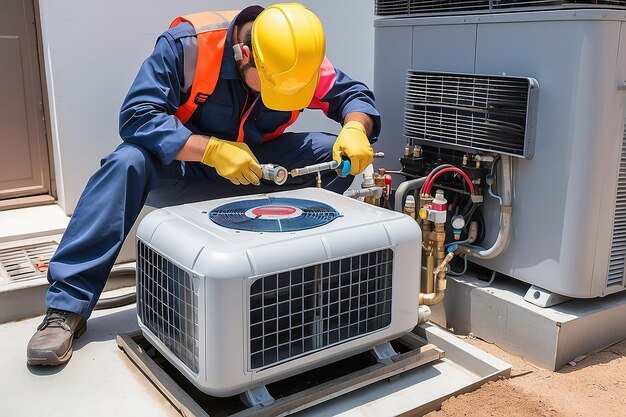
How to Repair & Maintain Your Home’s Steel Pipes
If your home is more than 30 years old, chances are, it works on a galvanized steel pipe system. While the plumbing systems of newer homes operate on copper or plastic pipes, steel pipes are still favorable. Not only do they now come in semi-rigid and flexible formats that experts recommend, they’re ideal for gas piping.
If you’re not looking to hire a professional to re-pipe your entire home, you’ll want to stick to your existing steel pipe system and learn the upkeep for yourself.
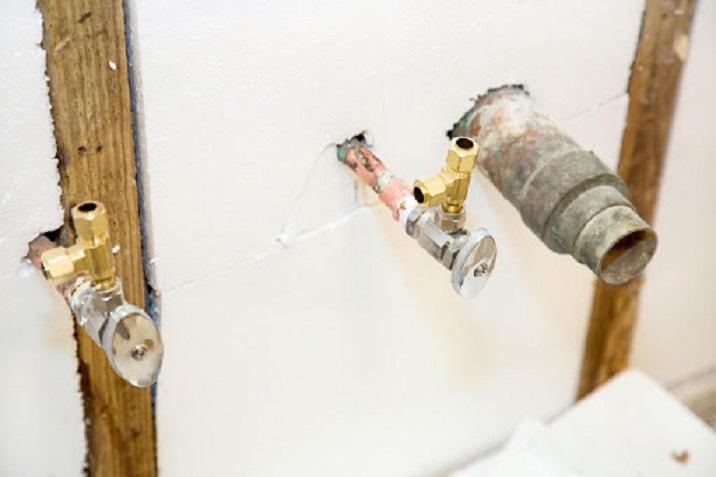
Black threaded pipe and galvanized pipe are used for most gas and water lines, both of which can be found at building supply stores. Galvanized pipes are traditionally used for water supply lines due to their inability to rust. This is because they’re coated in zinc. They can last decades with the proper repair and maintenance, you just need the right tools. These include:
- Pipe vise stand
- Rotary pipe cutter
- Threading die
- Reamer
- Hacksaw
- Pipe-thread tape
- 14-inch pipe wrench
- Tape measure
- Fittings
Many of these less practical tools can be rented, since you’re unlikely to keep them around the house (such as the pipe vise stand and rotary pipe cutter). Even with rental costs, however, it’ll likely cost you less than hiring a professional. It will be labor-intensive work, but it will get easier with time – especially once you have the right steps.
Step 1: Measure

First, measure the area of piping you wish to replace. While doing this, keep in mind that ½ inch and ¾ inch pipes go into each fitting about ½ inch. Therefore, take this into account while measuring the piece you wish to cut.
Home improvement and hardware store employees will also happily provide the exact measurements for you. We recommend buying long pipes for added flexibility – and more room for mistakes.
Step 2: Cut & thread

To begin cutting, secure the pipe into a pipe vise. Demarcate the length you wish to cut to on the pipe, perhaps with a Sharpie. You’ll need this cut to be even and exact. Then, using the rotary pipe cutter, cut the pipe to its precise length.
You’ll probably need to make a couple of turns around the pipe for a clean cut. Use lubricant or cutting oil to make this process easier. Take the reamer, and use it to smooth out the inside edge of the pipe.
Once the pipe is cut, use a thread cutting die to form the thread. Apply the pipe-thread tape to each end of the pipe before placing the piece into the fitting.
Step 3: Cut into line

Before you take on this step, make sure to shut the water supply off. Now, it’s time to tap into the line with a hacksaw or metal cutting blade. If you’re replacing a large portion of the line, it could take about an hour to get all of the fittings and unions into place. If there’s already a union fitting in the section you are replacing, you may even be able to avoid cutting a pipe.
If you are only replacing a small part of the pipe due to a leak, which most of these projects are, you don’t need to worry about how you’ll arrange the unions and fittings. Just cut out the damaged pipe, get two lengths of threaded pipe, and put them in the damaged pipe’s place with a union. Retighten back into place.
Using seamless pipe for your residential plumbing is your best bet, as it is more durable than welded pipe, which tends to be weaker at the seam.
Step 4: Twist on pipe & fittings

Finally, it’s time to get down to the nitty gritty. If you’re replacing a large section of piping, you need to begin threading in the pipe piece and twisting on the fittings. Twist on the pipe and fittings by hand. Then, take one pipe wrench to firmly tighten the fitting. Use an optional second wrench to hold the adjacent fitting into place and get a better grip.
Attach a union to the final pipe and use a union nut to tighten it to the end piece. This should create new, secure, leak-proof pipes that will last you many more years – without extensive plumbing or labor costs.