Easily Doable DIY Design Ideas for Your Rental Home
The saddest part of living in a rental home is that you cannot do much with its look. While we all want to give our home a signature look, home decoration may not always merely be a matter of its look; it’s also associated with convenience.
For example, maybe you need some more sitting arrangements or some extra shelves in your room to organize your stuff; this much you can surely manage to have in your rental place. But, you may not have enough money to spend on them.
In such a situation, DIY ideas are the best solutions. There are designs that look really smart, yet you can easily make them on your own at a much lower cost. Here are some of those DIY design ideas to help you decorate your rental home.
Suitcase Table

You can make a fancy multi-purpose table with storage out of your vintage suitcase.
Things You Will Need
- One vintage hard-sided suitcase.
- Four table legs painted to match the color of the suitcase.
- 16 screws and 4 angled top plates.
- Particleboard.
- Drill machine.
How to Make It
Get a piece of MDF or particleboard from any hardware store.
Cut it to fit properly inside of your suitcase using a jigsaw or ask the hardware store to cut it for you.
Angle the corners of the board if necessary to adjust to the round edge of the suitcase.
Take a tall stool and put that piece of the particleboard on top of it. Then, place the suitcase on it. Now, in each corner of the suitcase, locate a top plate and fix them with screws.
Make sure the screws can go through the plate to half the depth of the particleboard.
Fix the legs by twisting them on through the center holes of the plates.
Crate Storage

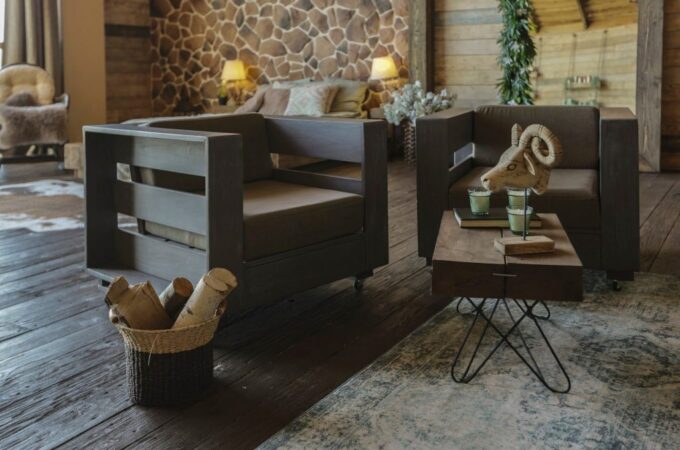
Save your floor space with this good-looking crate storage made of old wooden crates to decorate your magazines, candles, and showpieces inside it.
Things You Will Need
- 2 crates
- 6 screws, 25mm long
- Screwdriver
- 16 screws for castors, 10mm long
- 4 castor wheels, small
Optional Items
Sandpaper, clear polyurethane varnish, wood glue, wallpaper for decoration.
How to Make It
If you are recycling, it is better to sand and clean your wooden crates first. After cleaning them thoroughly, you can also coat the wood with clear polyurethane varnish for gloss and protection.
Arrange your crates according to your taste.
Attach the crates together to secure their position using the 25mm long screws. You can also do it using wood glue or heavy-duty adhesive, but if you do, you won’t be able to change the design later on.
Now, add castor wheels at the bottom. Attach one wheel at each of the corners of the bottom crate.
You can decorate it with removable wallpaper or simply use it as it is.
Easy Bench

Make this light bench with the simplest design to use around your home for various sitting purposes.
Things You Will Need
- 3 hardwood timber planks, each at least 4 cm thick.
- 2 heavy strap ties.
- Sanding machine.
- Screws, 3.8 cm
- Wood stain
- Paintbrush
- Paint-stirring stick
- Measuring tape
- 4 hairpin legs, 40 cms long, with screws.
How to Make It
Source your wooden planks as thick as you can, at least 4 cm.
Sand each plank very well using the sanding machine. Give particular attention to the edges and sides of the planks.
Place these planks side by side; make sure they are perfectly lined up.
Use the heavy strap ties on either side of the bench to keep these planks attached together. Keep the strap ties fixed in their position by using 3.8 cm screws in them.
Now, paint your new wooden bench using a wood stain and a brush. Stir the stain well before using it.
Mark the placement of the hairpin legs using the measuring tape. Place them accordingly, following the manufacturer’s guidelines.
Makeover Your Old Chair

If you have stools or chair seats that have gotten old, unpleasant, or boring, give them a new look by following the below instructions.
Things You Will Need
- Chair or bar stool that has a screw-on or drop-in seat.
- Gloves for protection.
- Screwdriver and flat-head screwdriver
- Pliers.
- Upholstery foam.
- Ruler.
- Pencil.
- Scissors.
- Staple gun (heavy-duty).
- Fabric to cover the seats.
Note
While measuring the fabric, keep 6 inches extra on each edge with the actual measurement of the seat.
How to Make It
Wear your gloves.
Clean your chairs or stools thoroughly.
Detach the seat from the stool by removing the screws from the underside and keep those screws separately in a safe place.
Remove the staples to take the existing fabric off the seat using a flathead screwdriver and pliers. If you find the upholstery foam in good condition, consider reusing it; otherwise, use it as a template to cut the new foam the same size.
Spread the fabric right-side down and place the seat in the middle of it. Adjust it according to the grains and design of the fabric. Draw an outline using the pencil. Remove the seat and put it aside.
Now, 6 inches outside the first, draw a second outline that will be used for folding the fabric around the stool seat. Cut the fabric following the second outline.
Place the foam in the middle; it should fit within the first outline.
Set the seat face-down and place it on the foam pad.
Fold the raw edges of the extra fabric and wrap it around the stool seat by stapling the underside of it. Make sure the fabric is tightly fitted over the seat, but don’t make it too tight.
Reattach the seat with the stool, and it is done!
Conclusion
It only takes a few creative ideas and enthusiasm to make beautiful home decoration pieces. So, follow these awesome ideas and decorate your home as you please, even if it’s a rental.


