Download msvcp140.dll for Windows 10, 8.1, 8, 7
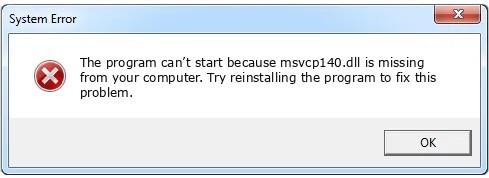
Msvcp140.dll is a file developed by Microsoft Corporation as a part of Microsoft® Visual Studio® 2015 Program. This .dll file helps in running programs and applications smoothly. Whenever you open an application or a game, it may issue errors or warnings if the .dll file is missing. You can fix these errors by downloading msvcp140.dll file in your Windows. Several fixes are available to avoid these errors, one of which is mentioned in this article.
Here is how an msvcp140 file download can be done on Windows 10, 8.1, 8, and 7:
Step 1: Download the DLL-files.com Client
If your computer is missing or cannot locate the msvcp140.dll file, you can download and install the DLL-files.com Client. The client automatically figures out your .dll file requirements so you do not have to worry about it or complete a manual check.
- Download and install msvcp140.dll.
- Run the application after installation.
Step 2: Search for Msvcp140.dll File
Once you run the application, search for the required file by typing its name in the box and then click Search for DLL file.

Step 3: Click on Msvcp140.dll in the Search Results
Click on the appropriate file in the search results that appear.
Step 4: Click Install
Click Install at the bottom of the application screen. When you do, you will be prompted to register on the client application. After doing so, your install will automatically start.
There are some other ways to fix the error. Two of these ways include: a clean reinstallation of the program or application giving you the error, and copying the .dll file from another trusted computer.
A Fresh Re-installation of the Program or Application
The error message “msvcp140.dll file is missing” itself suggests that a clean installation may fix the error. Here is how to do that:
- Open the Run dialogue box on your computer by pressing the Windows logo key and R simultaneously.
- Type appwiz.cpl and click OK. This will open control panel with all the programs listed that are installed on your computer.
- Scroll to the program that is giving you the “missing .dll file error” and right-click on it.
- Click Uninstall when a menu appears on the screen.
- This will prompt a dialogue box asking for confirmation. Click Yes to confirm your decision to uninstall the program.
- Restart your Windows.
- Start a fresh installation of the same program and then launch or run it.

Copy the Same File From another Trusted Computer
The second method to avoid the error is to copy the msvcp140.dll file from a trusted computer. To do this, you have to:
- Ensure that both the computers have the exact same version and architecture of the operating system or Windows.
- On that computer, open File Explorer (short-cut keys are Windows logo key + E) and go to C:\Windows\System32 to copy the file msvcp140.dll there.
- Now, paste that copied file to the exact same location, i.e., C:\Windows\System32 on your own computer. Make sure you have an external storage device for that purpose.
Now, launch the program that was giving you the error before. It may start working now – free of errors!
It is also recommended that you run a general virus scan to figure out if there is any malware on your computer. A virus may be preventing your computer from locating the msvcp140.dll file in the first place, hence, resulting in the “missing file” error.
One of these methods will surely work for you in fixing the error – good luck!