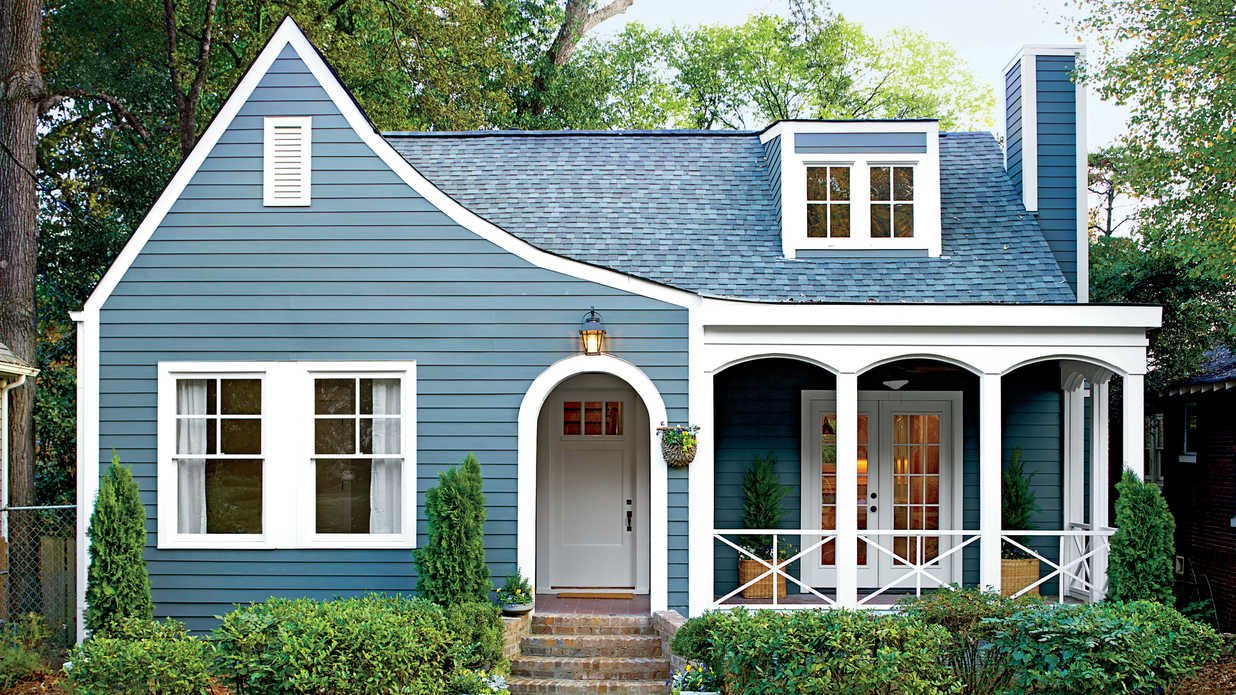
7 Best Ways to Paint a House Exterior
The outside of your house no longer suits you? Do you want to repaint your walls? In order to repaint your exterior walls, you will be required to remove any removable items found there such as the mailbox, outdoor lamps and garden furniture that are placed near the walls. After completing this step, you will need to proceed with cleaning the facades, which can be done using a high-pressure washer. If your house is multi-story, it’s better to hire scaffold services. LakesideHire provides scaffold services at an affordable price with free delivery. After you’ve equipped yourself with all the necessary things required for painting, you just need to follow these 7 steps in order to paint the exterior of your house.
Peel off the area which cannot take the load

If the plaster trickles or the old paint peels off the facade paint slightly, the unsustainable areas must be removed and repaired before repainting. The load-bearing capacity of the facade can also be tested with the adhesive tape test. To do this, slightly scrape the test surface with a craft knife, glue the painter crepe firmly on it and tear off the adhesive strip sharply. If parts of the old paint remain stuck, the substrate is not stable and must be removed. If you are planning to paint a multi-story house, it is better to use scaffolding. This makes work immensely easier and increases your security significantly. Even at ground level paintings, a smaller scaffolding can be helpful.
Thoroughly clean the substrate before painting
A plastered house needs, for even once, a new coat of paint at regular intervals. All surfaces must be clean, dry and dust-free. The cleaning of the facade can also be done with the help of a high-pressure cleaner. Brush off any existing moss and algae before painting or remove with suitable means. Clean the facade before priming and painting, and remove any dirt or discoloration thoroughly. After cleaning, the wall of the house should dry well, so that the following primer can penetrate better into the facade. New, non-weathered plaster does not need to be cleaned before priming. It is required by law that you completely capture and properly dispose of wastewater, paint residues, blasting sand and abrasion. Shield the work site to all sides and in full height by a tarpaulin. For detailed information on proper disposal, you should contact your local environmental authority.
Repair the wall

Improve wall cracks and facade holes and, if necessary, plaster the corresponding areas of the house wall. Without repairing the crack and holes present on the wall, you cannot step ahead. The new painting will not stay on the wall if the exterior is not repaired.
Apply primer to the exterior
In order for our future paint to keep well on the surface, it is necessary to improve the adhesive properties of the surface. If you improve the adhesion of the wall surface, the ceiling with the finishing material, the paint will stay on the surface longer. Priming the walls before painting is necessary in order to: improve the structure of the base; reduce moisture absorption; use paint sparingly. The high-quality primer solidifies the substrate and ensures even absorption. Thus, the facade paint dries evenly, adheres securely, and the consumption of color is reduced when painting. It will be enough one layer of paint – concrete or plastered walls will not shine through the painted surface. You should allow the wall to dry thoroughly after priming.
Choose the paint

Choosing the type of paint that best suits your home will depend on the current state of the walls. If the surfaces are very irregular it is better to choose an effect or structured painting. In fact, the best structured masonry paint at kitchenhome.co.uk will create a more rustic effect, making it very useful for older walls that have undergone repairs. You could also choose to use a smooth paint. This kind of paint is generally applied for walls in good condition that require little or no repairs. If your wall is in a relatively damp location, you should apply an antifoam underlay before going to the painting stage. In any case, be aware that these materials are elastic and will protect your walls from moisture.
Equip yourself and paint the exterior (intermediate coat)
To paint your exterior, you will have to equip yourself accordingly. We recommend buying a special facade roll, which varies in thickness depending on the type of surface. Start the work by painting the sections in the shade, to prevent the surface from drying too quickly. Use both a brush and a roller, the first serving small areas and the second being perfect for larger areas. You can paint the exterior with water diluted paint. This reduces the viscosity of the paint and makes it easier to work, penetrates better into the house wall and ensures good adhesion of the final coat.

Final coat
Allow the first coat to dry well and paint the facade a second time with undiluted facade paint. Regarding the number of layers, follow the instructions specific to the product you have chosen. If you have to do several layers, do not forget to let each of them dry properly before going back to work. Also, paint the walls first before covering the surfaces of window frames and doors.
You can extend the life of your house through proper maintenance. Replacing crack every year, washing the stains from birds, timely repair, etc. can renew your house.