DIY – How to Install a Water Softener?
Introduction to Water Softeners
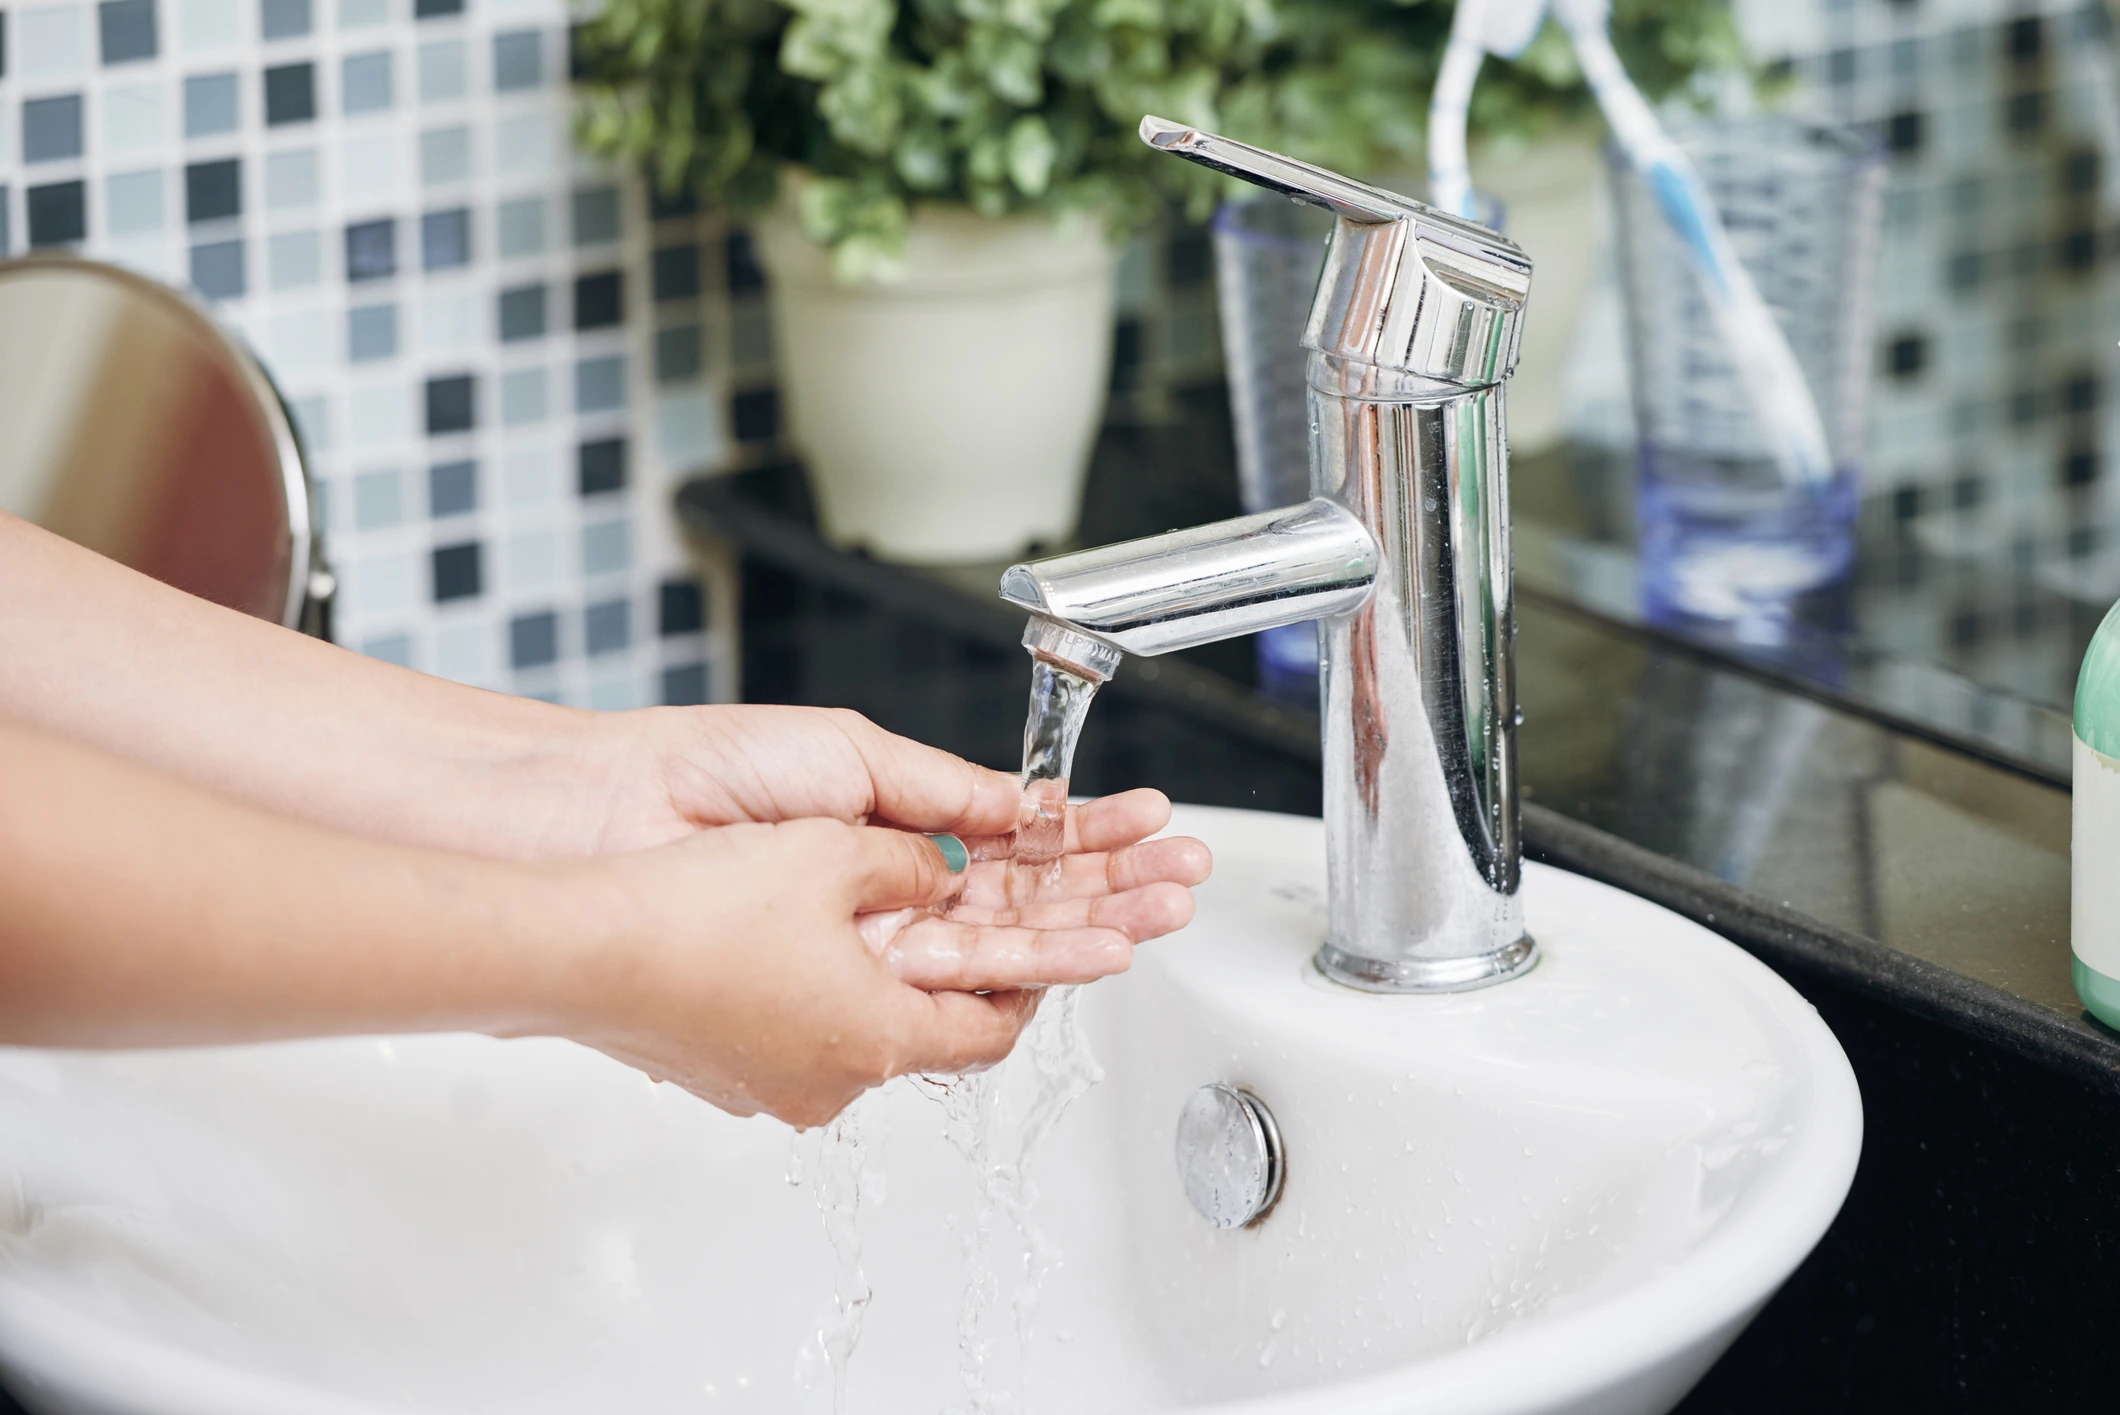
Water softeners are essential household devices designed to remove minerals that cause water hardness, such as calcium and magnesium ions, through a process called ion exchange. Hard water can create numerous issues, including limescale buildup in pipes and appliances, reduced soap efficiency, and increased wear and tear on water-using appliances. By installing a water softener, you can enjoy the benefits of soft water, which extends the lifespan of your plumbing system, increases the efficiency of cleaning products, and leaves your skin and hair feeling smoother.
In this DIY guide, we will walk you through the easy steps to install a water softener in your home, ensuring that you can enjoy all the advantages of soft water while saving money on plumbing repairs and maintenance.
Understanding the Need for a Water Softener
Before delving into the installation process, it’s essential to understand why a water softener is necessary. Hard water contains high levels of calcium, magnesium, and other minerals that can create multiple issues within your home. These minerals react with soap to form soap scum, reducing the lathering ability and effectiveness of soaps and detergents. As a result, you may find it challenging to produce enough lather when showering, washing dishes, or doing laundry.
Moreover, hard water causes the buildup of limescale in pipes, water heaters, and appliances. Over time, this can lead to decreased water flow, reduced efficiency, and even premature failure of these appliances. Limescale deposits may also clog showerheads, faucets, and other fixtures, leading to a decrease in water pressure.
By installing a water softener, you can address these issues at their source. The water softener works by replacing calcium and magnesium ions with sodium ions, effectively softening the water and preventing the formation of limescale. Soft water ensures that your soap and cleaning products work more efficiently, reduces the need for excessive detergent usage, and extends the lifespan of your plumbing system and appliances.
Assessing Water Hardness Levels
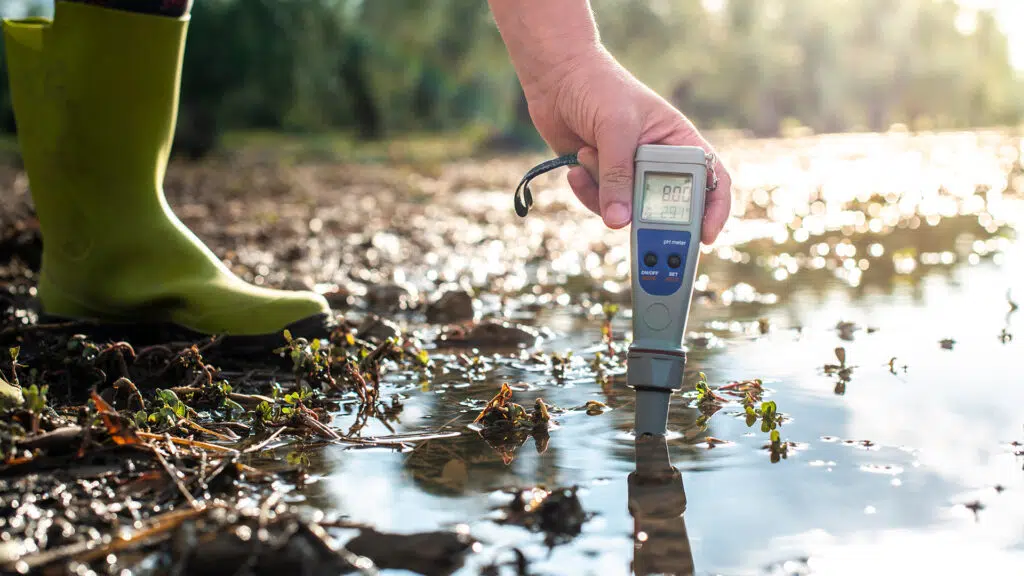
Before selecting a suitable water softener for your home, it’s essential to assess the hardness level of your water. Water hardness is measured by grains per gallon (GPG) or parts per million (PPM). The United States Geological Survey (USGS) classifies water hardness as the following:
Soft Water: 0 – 1 GPG (or 0 – 17.1 PPM)
Slightly Hard Water: 1 – 3.5 GPG (or 17.1 – 60 PPM)
Moderately Hard Water: 3.5 – 7 GPG (or 60 – 120 PPM)
Hard Water: 7 – 10.5 GPG (or 120 – 180 PPM)
Very Hard Water: 10.5+ GPG (or 180+ PPM)
You can typically obtain information about your water hardness from your local water supplier or through DIY water testing kits available at hardware stores.
Understanding your water hardness is crucial as it helps determine the capacity and type of water softener required for your household. A larger household with higher water usage and very hard water will need a more robust and higher capacity water softener compared to a smaller household with soft water.
Once you know your water hardness level, you can proceed to choose the appropriate water softener that suits your needs.
Choosing the Correct Water Softener for Your Home
Selecting the right water softener for your home involves considering various factors, including water hardness level, household size, and available space for installation. Here are some important steps to guide you through the process:
- Determine Water Softener Capacity: Calculate the required capacity based on your household’s water usage and the hardness level of your water. The capacity of water softeners is measured in grains, and it indicates the amount of hardness the softener can remove before regeneration is necessary. A larger household or very hard water may require a high-capacity water softener.
- Decide on the Type of Water Softener: There are different types of water softeners available, including salt-based ion exchange softeners, salt-free softeners, and dual-tank softeners. Salt-based softeners are the most common and effective at removing hardness minerals. Salt-free softeners are a good option for those concerned about sodium intake or want a maintenance-free system. Dual-tank softeners provide continuous softened water as one tank regenerates while the other remains in service.
- Consider Space and Installation Requirements: Evaluate the available space for installing the water softener. Some models are more compact and suitable for small spaces, while others may require a larger installation area. Additionally, ensure that your plumbing setup allows for easy integration with the water softener.
- Research Brands and Reviews: Look for reputable water softener brands with positive customer reviews and reliable warranties. Reading reviews and testimonials can give you valuable insights into the performance and longevity of various models.
- Budget Considerations: Water softeners come in a range of prices, so it’s essential to set a budget and find a model that meets your needs without exceeding your budget. Consider the long-term savings from reduced maintenance and appliance longevity that soft water provides.
By carefully considering these factors, you can make an informed decision and choose the best water softener to meet your household’s specific requirements.
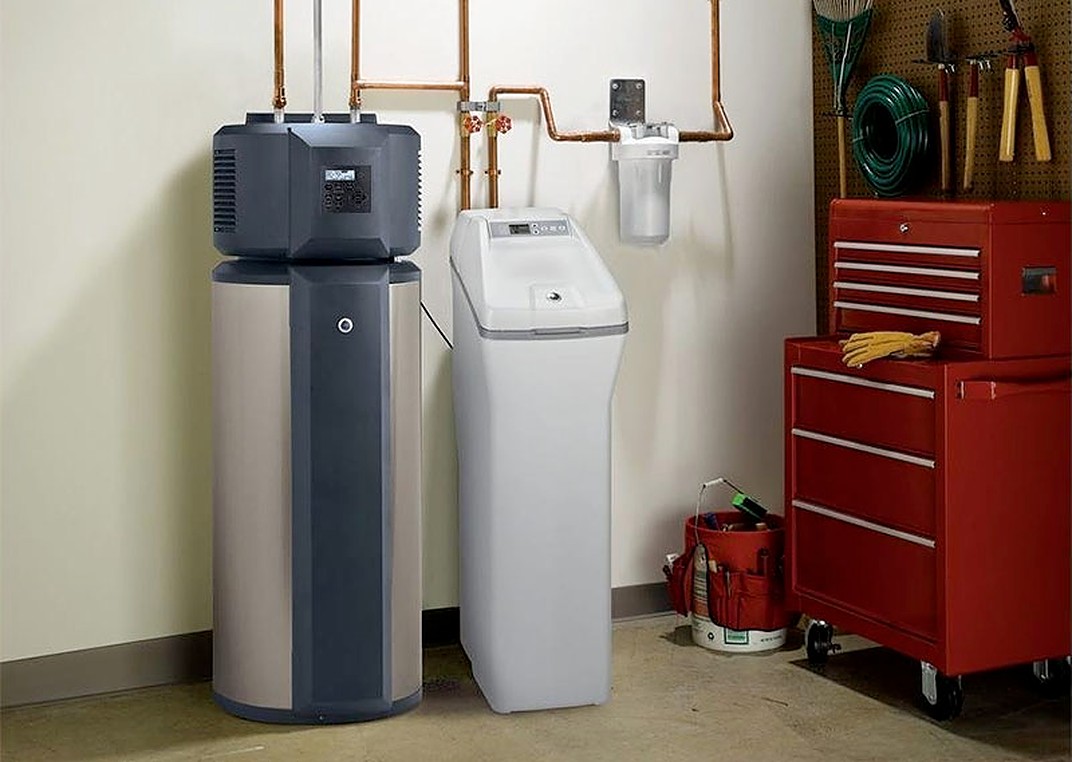
Gathering the Necessary Tools and Materials
Before starting the installation process, gather all the necessary tools and materials to ensure a smooth and efficient setup. Here’s a list of items you’ll need:
- Water Softener Unit: The main component of the water softening system, selected based on your household’s capacity requirements and water hardness level.
- Water Softener Resin: Required for salt-based water softeners. The resin is responsible for the ion exchange process that removes hardness minerals from the water.
- Brine Tank: For salt-based water softeners, this tank holds the salt or potassium chloride used for regeneration.
- Resin Cleaner (Optional): Helps maintain the performance of the resin bed over time by preventing iron and other deposits.
- Bypass Valves: Allows you to shut off water supply to the water softener during maintenance or when not needed.
- Drain Line and Fittings: Used to connect the water softener to the drain for brine disposal and regeneration.
- Inlet and Outlet Pipes: Connect the water softener to the main water supply.
- Compression Fittings: To connect pipes securely without soldering.
- Pipe Cutter or Saw: For cutting pipes to the appropriate length during installation.
- Teflon Tape: Used to create watertight seals on threaded connections.
- Wrenches and Screwdrivers: Essential tools for tightening fittings and securing components.
- Level and Measuring Tape: Ensures the water softener is level and properly aligned during installation.
Having all these tools and materials ready before you start the installation will save you time and minimize interruptions during the process. Remember to follow the manufacturer’s instructions and local plumbing codes while installing the water softener to ensure safe and effective operation.
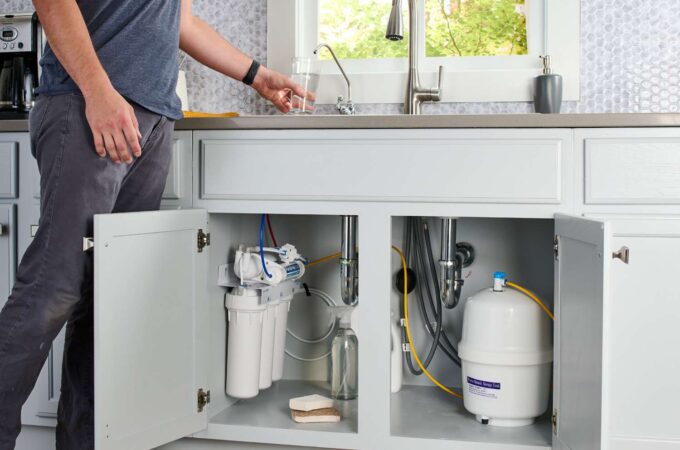
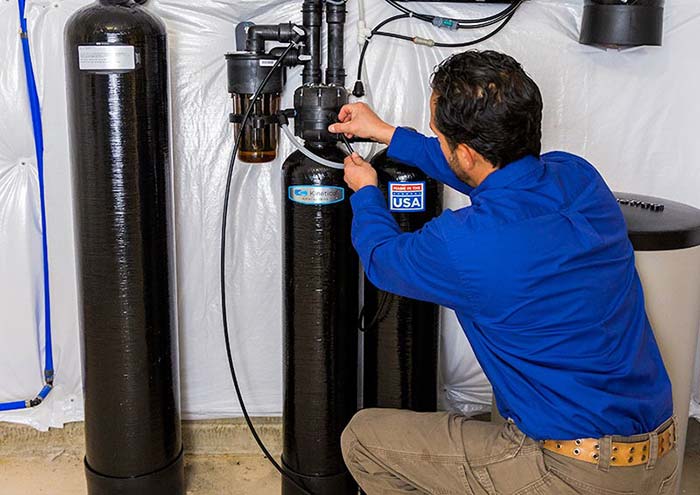
Step-by-Step Guide to Installing a Water Softener
Installing a water softener can seem like a daunting task, but with the right guidance, it’s a manageable DIY project. Before you begin, make sure you have all the necessary tools and materials mentioned in the previous section. Follow these step-by-step instructions to install your water softener properly:
Shutting Off Water Supply and Draining Pipes:
- Locate the main water supply valve to your home and shut it off. This valve is usually located near the water meter.
- Open all faucets and fixtures in your home to drain the remaining water from the pipes.
Determining Optimal Location for Installation:
- Select a suitable location for the water softener. It should be near the main water supply line and a drain for brine disposal.
- Ensure the area is well-ventilated and has enough space to accommodate the water softener and brine tank.
Installing Bypass Valves:
- Install bypass valves on the inlet and outlet pipes of the water softener. Bypass valves allow you to shut off water flow to the softener during maintenance or repairs.
- Follow the manufacturer’s instructions for proper installation of the bypass valves.
Connecting the Inlet and Outlet Pipes:
- Connect the inlet and outlet pipes to the water softener using compression fittings. Ensure the connections are secure and leak-free.
- Use Teflon tape on the threaded fittings to create watertight seals.
Setting Up the Brine Tank:
- If you’re using a salt-based water softener, set up the brine tank next to the water softener unit.
- Connect the brine tank to the water softener following the manufacturer’s instructions.
Connecting the Drain Line:
- Connect the drain line from the water softener to a suitable drain or floor drain. Ensure it is securely fastened to prevent leaks.
Adding the Resin and Initiating the Regeneration Process:
- For salt-based water softeners, follow the manufacturer’s guidelines to add the appropriate amount of water softener resin to the resin tank.
- Initiate the regeneration process according to the softener’s manual. This process varies depending on the type and model of your water softener.
Flushing the System:
- After installation, open all the bypass valves and the main water supply valve.
- Allow water to run through the system for a few minutes to flush out any air and debris.
Check for Leaks and Adjust Settings:
- Inspect all connections and fittings for leaks. If you notice any leaks, tighten the fittings or make necessary adjustments.
- Adjust the water softener settings based on your water hardness level and household water usage.
Follow the Maintenance Schedule:
- Keep track of the maintenance schedule for your water softener. This includes adding salt to the brine tank and periodic resin bed cleaning or replacement.
- Remember to consult your water softener’s manual for specific installation instructions and follow any local plumbing codes or regulations during the installation process.
Maintenance Tips for Optimal Water Softener Performance
Proper maintenance is crucial to ensure your water softener operates efficiently and provides softened water consistently. Here are some essential maintenance tips:
- Regularly Check Salt Levels: For salt-based water softeners, check the salt levels in the brine tank regularly. Maintain an adequate level of salt to ensure proper regeneration and softening of the water.
- Monitor Resin Bed: Periodically inspect the resin bed for any signs of fouling or degradation. Clean or replace the resin if necessary to maintain optimal performance.
- Clean Brine Tank: Clean the brine tank occasionally to remove any sediment or residue that may accumulate at the bottom. This prevents clogging and ensures a smooth regeneration process.
- Check for Salt Bridges: Salt bridges occur when a hard crust forms above the salt in the brine tank, preventing proper water softening. Break up any salt bridges to maintain consistent water softening.
- Schedule Regular Maintenance: Follow the manufacturer’s recommended maintenance schedule, which may include professional inspections and resin bed cleaning.
- Use High-Quality Salt: If you’re using salt-based water softeners, opt for high-quality salt pellets or blocks to reduce the chances of impurities affecting the resin bed.
- Address Any Leaks Promptly: If you notice any leaks or drips around the water softener or its connections, fix them immediately to prevent water wastage and potential damage.
- Test Water Hardness Periodically: Test your water hardness periodically to ensure that your water softener is working correctly. Make adjustments to the settings if necessary.
- Keep the Area Clean and Dry: Ensure the area around the water softener and brine tank remains clean and dry to avoid potential damage and mold growth.
By following these maintenance tips, you can prolong the lifespan of your water softener and enjoy the benefits of softened water for years to come.
Conclusion: Enjoying the Benefits of Softened Water
Congratulations! You have successfully installed a water softener in your home, and now you can start enjoying the many benefits of softened water. Let’s recap some of the advantages and the positive impact it will have on your daily life:
- Elimination of Limescale Buildup: With softened water, you can say goodbye to limescale deposits in your pipes, appliances, and fixtures. This will not only extend the lifespan of your plumbing system and water-based appliances but also maintain their efficiency over time.
- Improved Cleaning Performance: Softened water allows soap and detergents to lather more effectively, resulting in better cleaning performance. You’ll notice cleaner dishes, softer laundry, and a more refreshing shower experience.
- Softer Skin and Hair: Softened water is gentle on your skin and hair, leaving them feeling smoother and less prone to dryness or irritation. You may even find that you need less lotion and conditioner than before.
- Reduced Energy Consumption: As your appliances work more efficiently with softened water, they will use less energy, which can lead to cost savings on your energy bills.
- Extending the Lifespan of Appliances: Water softeners help protect your water-based appliances, such as water heaters, washing machines, and dishwashers, from the damaging effects of hard water. This translates to fewer repairs and longer lifespans for these expensive appliances.
- Less Time Spent Cleaning: With softened water, you’ll spend less time scrubbing away soap scum and limescale in your bathroom and kitchen. Cleaning will become a breeze.
- Eco-Friendly Benefits: By reducing the need for harsh chemical cleaning products and extending the lifespan of appliances, softened water contributes to a more eco-friendly household.
- Healthier Pipes and Plumbing: Softened water helps maintain the integrity of your pipes, reducing the risk of leaks and water damage in your home.
- Softer and Brighter Fabrics: Softened water is gentle on fabrics, preserving their colors and softness, and prolonging the life of your clothes and linens.
Remember, to continue enjoying these benefits, it’s essential to follow a regular maintenance schedule for your water softener. Regularly check salt levels, monitor resin bed performance, and clean the brine tank as needed.
Additionally, stay mindful of any changes in water quality and hardness levels over time. As your water softener operates, its effectiveness may vary, especially if your household’s water usage patterns change. Adjust the settings accordingly or consult a professional if you notice any issues. Installing a water softener is a worthwhile investment that improves your quality of life, saves you money in the long run, and contributes to a more sustainable home. So enjoy the luxury of soft water, and revel in the benefits it brings to your everyday living!